Projects
A Project is an overall container that represents the skills ruleset for a single application with gamified training. Project's administrator(s) manage skill definitions, subjects, levels, dependencies and other attributes that make up an application's training profile.
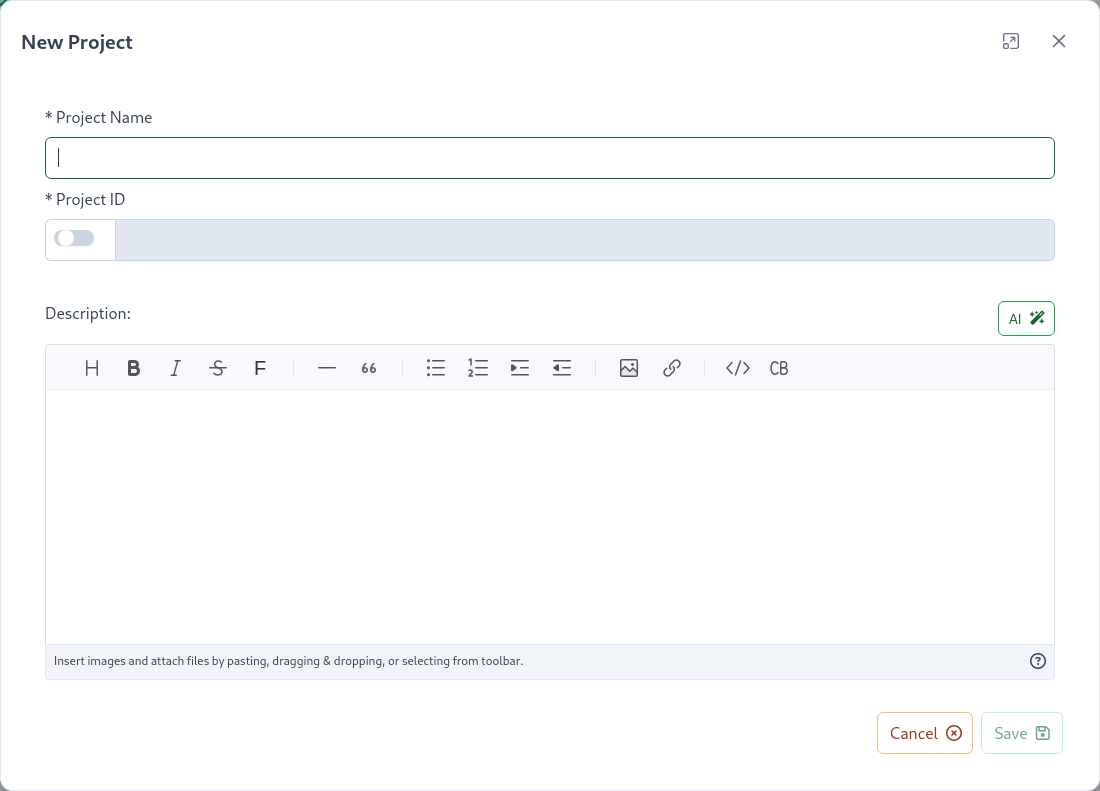
Creating a project is simple, all you need is a name. While the project id is required, it will be automatically generated (you can optionally override the generated id).
Tips
You can optionally add a project description. Where project description is shown can be configured in Project Settings using the Project Description setting.
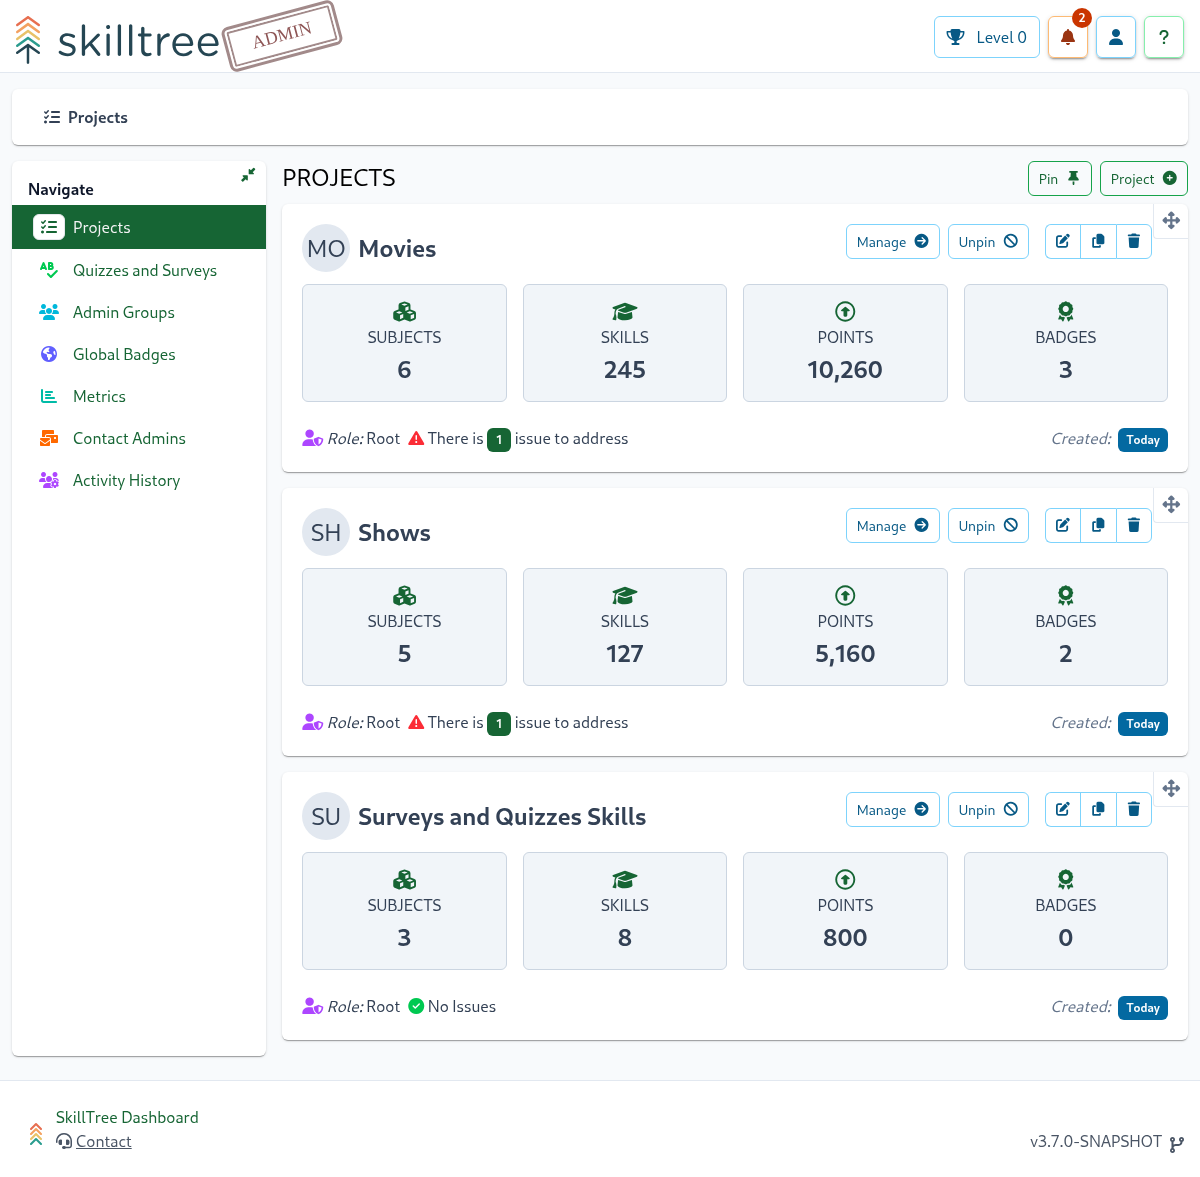
To create a project click the Project + button.
Tips
Did you know, you can use SkillTree's AI Assistant to generate descriptions, Learn more
A Project is composed of Subjects which are made up of Skills and a single skill defines a training unit within the gamification framework. Once the project is created you have an empty canvas on which to compose and manage your application's training profile. Generally the next step is to create a number of Subjects and then start constructing Skill definitions within those Subjects.
The Dashboard user that creates a project is automatically granted the role of administrator of that project. Project administrators enjoy the following benefits:
| Function | Explanation |
|---|---|
| Subjects | Add, edit or remove Subjects |
| Skills | Add, edit or remove Skill definitions |
| Self Reporting | Self Report is a feature that empowers users to mark skills as completed directly in the SkillTree dashboard OR through the embedded Skills Display component. |
| Access Management | Manage Project's Admin/Approver roles and Private Invite Only access |
| Badges | Add, edit or remove Project's Badges |
| Levels | Customize number of Levels and their attributes |
| Learning Path | Specify the order of Skills completion. For example Skill A must be completed before Skill B can be attempted |
| Cross-project Prerequisites | Create and manage Skill prerequisites across multiple Projects which practically equates to cross-application Skills |
| Contact Users | Communicate with users of your Project |
| Metrics | Charts and graph. These are page specific - Project, Subject, Badge, and User will have stats specifically for those pages |
| Issues | Errors related to the Project such as non-existant Skills that have been reported |
| Settings | Project level settings |
Settings
To manage and view project-wide settings navigate to Project -> Settings.
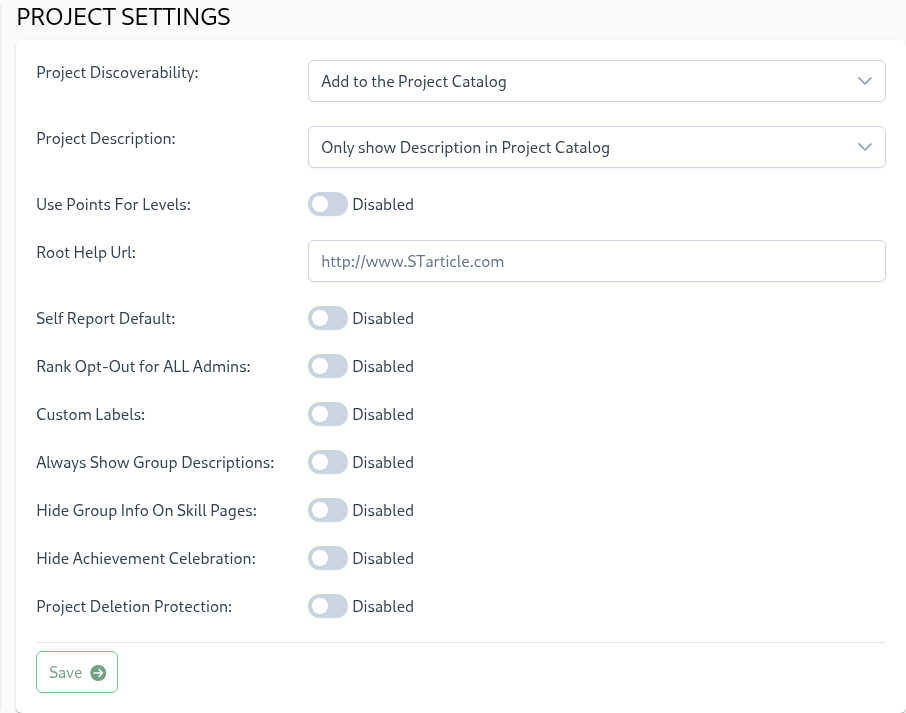
The following project-level settings are available:
Setting: Project Discoverability
There are three possible values for the Project Discoverability setting:
- Not in the Project Catalog (default value)
- Add to Project Catalog
- Private Invite Only
Not in the Project Catalog projects can be accessed by users who have a direct link (Preview button) to the project's Skills Display or by applications that have integrated the SkillTree client libraries. The project will not be available in the Projects Catalog view.
Add to Project Catalog projects can be discoverd by users in the Projects Catalog view.
Private Invite Only projects can only be accessed by users who have been invited to join the project and who have accepted the invite. Any other user attempting to access the project will receive an Access Denied error. Users who have been designated as Project Administrators will continue to have access to the project. Users can be invited to join the project using the Project Access page.
Warning
There may be a delay of up to several minutes after changing a Project Discoverability from or to Private Invite Only before the change is reflected for all users.
Setting: Project Description
There are two possible values for the Project Description setting:
- Only show Project Description in Manager My Projects (default value)
- Show Project Description everywhere
Only show Project Description in Manager My Projects is the default value for a Project. With this setting, any project description that has been configured will only be displayed in the Manage My Projects view - in the future the description may be visible to other Project Administrators in the Import Skills From the Catalog dialog. Show Project Description everywhere will cause any configured project description to be displayed anywhere that the training profile is displayed, including in the Manage My Proejcts view. This setting may be most applicable for SkillTree users whose training profile is viewed primarily through the Progress and Ranking view in the SkillTree dashboard.
Setting: Use Points For Levels
Use Points For Levels - switch between two level management strategies:
- Percentage based - levels are calculated based on configured percentages of total available points (ex. Level 1 = 10% of total points)
- Point based - project admins specify start and end point values for each level
By default, the Percentage based strategy is configured, changing the Use Points For Levels setting to true enables Point Based explicit level point management. To learn more please see the Levels section.
Warning
You must define at least 100 points for a project before switching to point-based levels management
Setting: Root Help Url
Skill definition's Help Url/Path will be treated relative to this Root Help Url. For example, if
Root Help Url=http://www.myHelpDocs.com- and a Skill definition's
Help Url=/important/article
then the client display will concatenate Root Help Url and Help Url to produce http://www.myHelpDocs.com/important/article.
Tips
If a Skill's Help Url starts with http or https then Root Help Url will NOT be utilized.
If a Skill's Help Url is blank then no url will be displayed even if Root Help Url is configured. In other words Root Help Url only works in conjunction with a Skill's Help Url.
Setting: Self Report Default
By default, Self Reporting is disabled when creating or modifying a skill. If your project primarily consists of Self Reported skills, enabling Self Report Default will result in the selected Self Report Approval type being the default for any skills created after this point
Please visit Self Report section to learn further.
Setting: Rank Opt-Out for ALL Admins
When enabled, all project admins will be excluded from the Leaderboard and will not be assigned a rank within the embedded Skills Display component
Setting: Custom Labels
Certain terminology in SkillTree may be overloaded to some organizations and could be confusing to end users. If this is the case, admins can customize the following labels displayed to users in the embedded Skills Display component and Progress and Ranking pages:
- Project
- Subject
- Group
- Skill
- Level
Setting: Always Show Group Descriptions
Toggle this setting to always show the group's descriptions in this project embedded Skills Display component and Progress and Ranking pages.
Setting: Hide Group Info On Skill Pages
By default, the skill page displays the group name and description when a skill is part of a Skill Group. Enabling this setting will hide the group's information from the skill page.
Setting: Hide Achievement Celebration
Trainee achievement celebrations are displayed throughout training displays when levels, badges, and skills are achieved. These congratulatory messages can be hidden by enabling the Hide Achievement Celebration setting.
Setting: Project Deletion Protection
When this setting is enabled, project deletion will be prevented, and the Delete button will be hidden.
Access
The Project Access page supports adding or removing Project Administrators, Project Approvers, and inviting users to join a project if the project has been configured as an Invite Only project as well as revoking a user's access.
To add and remove project Administrators and Approvers navigate to Project -> Access page.
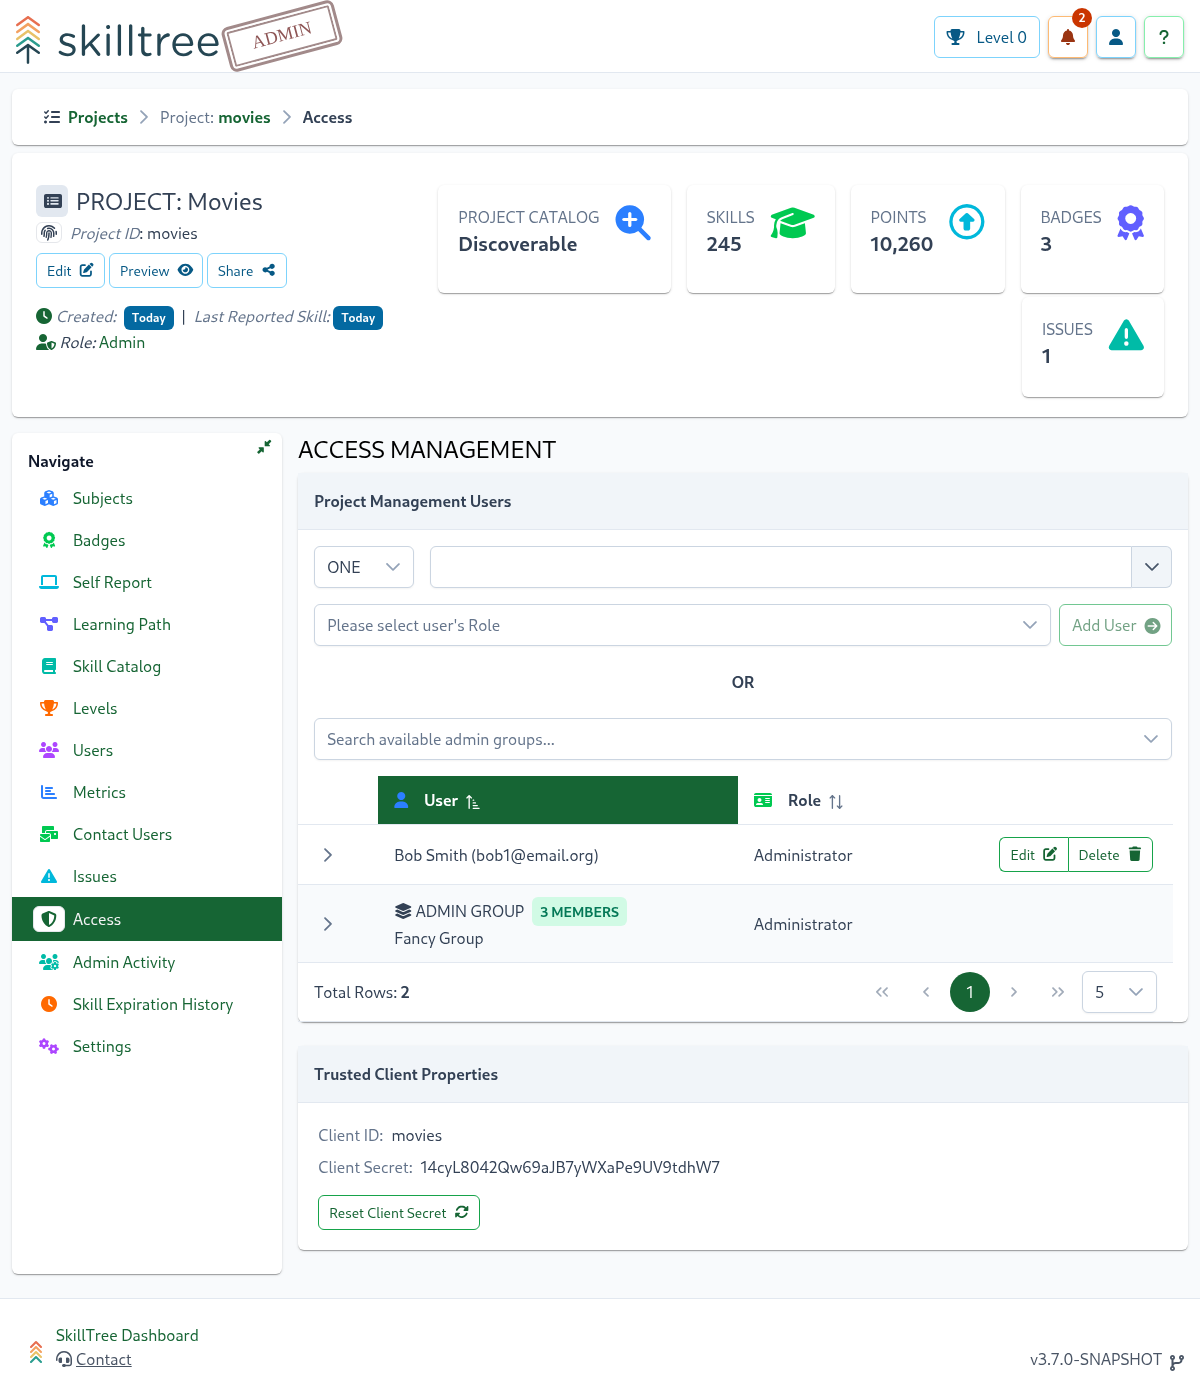
You must have an Admin role in order to manage other Admin and/or Approver users for a project. There supported project roles are:
- Admin: enables management of the training profile for that project such as creating and modifying subjects, skills, badges, etc.
- Approver: allowed to approve and deny Self Reporting approval requests while only getting a read-only view of the project.
Invite Only
If the project has been configured with a visibility of Private Invite Only, invite and access revocation are controlled here.
Tips
The Project User: Invite and Project User: Revoke user interface controls are only displayed if the project has been configured with a Project Discoverability of Invite Only
Invite Users
Users can be invited to join a project configured as Private Invite Only via email. To invite users:
- Enter email addresses in the
Email Addressesfield using any of these formats:- One at a time
- Comma or semicolon separated list
- One per line
- With display names (e.g.,
<some@email.address> Firstname Lastname) is also supported
- Click
Add Recipientsto add them to the recipient list - Repeat to add more recipients if needed
- Optionally, add CC recipients in the
CC Email Addressesfield - Click
Send Invitesto deliver one-time use invitations to all recipients
Each recipient will receive a unique, one-time use invitation to join the project.
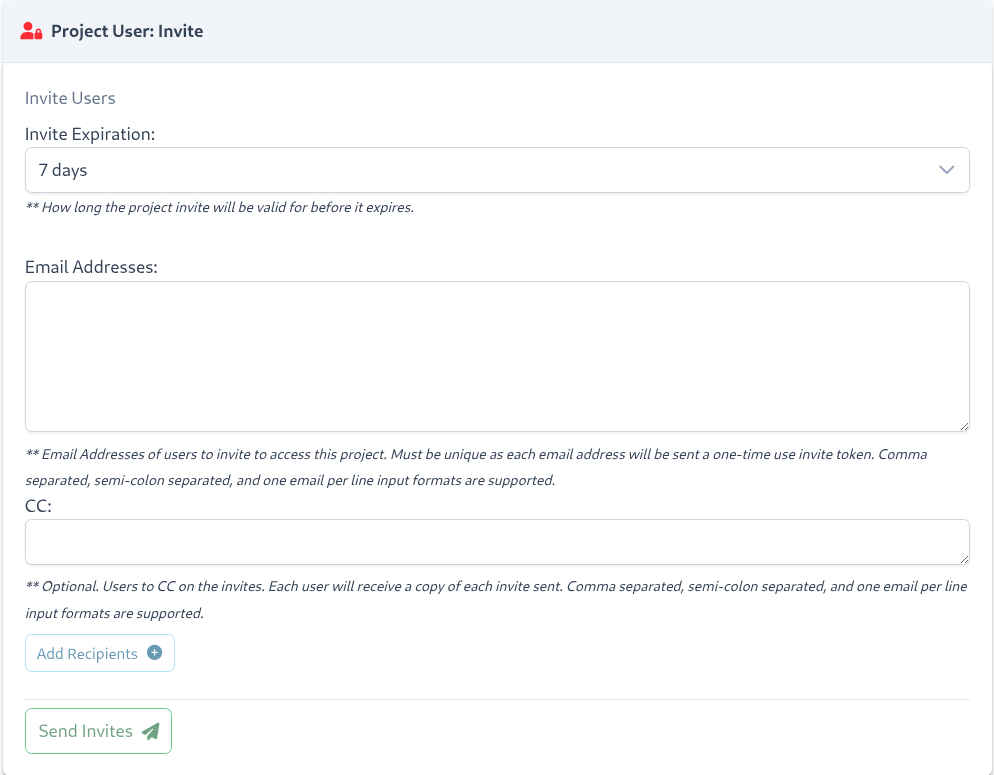
Project invites may be configured to expire if not accepted within a certain time frame. Please note that the expiration configuration is only applicable to how long the invite code itself is valid. Once a user has accepted a valid invite code and joined the project, the invite expiration configuration is no longer relevant for that user.
Tips
Each email recipient receives a unique project invite code, therefore distribution lists or group email accounts should not be added as recipients as only the first person to claim the invite will be able to use it.
Important
To invite users to join a Private Invite Only project, the SkillTree instance MUST be configured to support email. Please see Email Server Settings for more information.
Manage Invites Pending Acceptance
Once Project Invites have been sent to users, any invites that have not yet been accepted or invites that have recently expired can be managed through the Invites Pending Acceptance table below the Invite Users form.
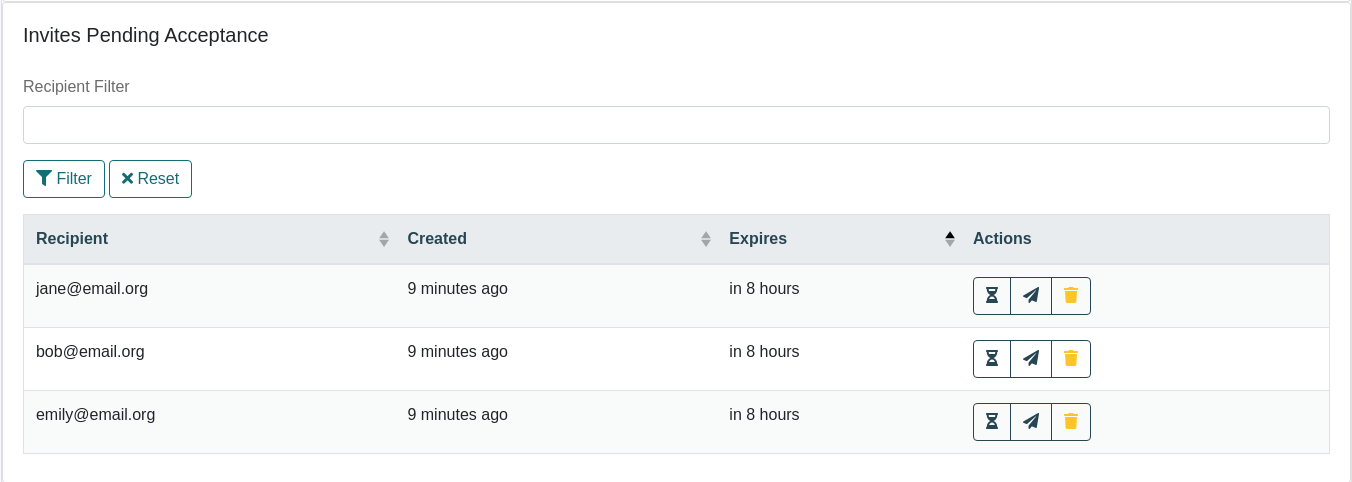
Once an invite has been accepted by a user, it will no longer be displayed in the Invites Pending Acceptance table, in that case the user will appear in the Revoke Access table.
The actions that can be performed on each invite are: expiration time extension, remind user of invite, and delete invite.
Expiration Time Extension can be performed for any invite listed in the Invites Pending Acceptance table. For invites that are not yet expired, the selected extension time will be added to the invite's current expiration time. For invites that have expired, the selected extension time will be added to the time at which the extension is performed. For example, if an invite expires in 15 minutes and it is extended by 30 minutes, it will expire in 45 minutes. If an invite is currently expired and is extended by 30 minutes, it will expire in 30 minutes.
Remind User of Invite will send a reminder email to the user, encouraging the user to accept the project invite. It is important to note that a reminder cannot be sent for an invite that has expired. If an invite has expired, it must first be given an extension at which point the notification button will become enabled and a reminder may be sent to the user.
Delete invite will cause the selected project invite to be deleted, any future attempts to use that invite code will fail. Note that a new invite can be generated for the user whose invite was deleted if desired. Expired invites may be deleted to remove them from the view prior to removal by automated cleanup processes.
Tips
Expired invites are, by default, visible for 30 days after they have expired; however, this is a configurable, system level, property that may be configured differently depending on the environment
Revoke Access
Once a user has accepted an invitation to join a project configured for Invite Only visibility, that user will show up under the Revoke Access table at which point their access can be revoked and they will no longer have access to the project.
Tips
When a user's access to an Invite Only project has been revoked, only that user's access is removed. Their achievement history is retained in case they are granted access in the future or the project's visibility is changed.
Copy Project
To use an existing Project as a template, you can easily copy its training profile (subjects, skills, badges, etc.) into a brand-new project.
To copy a project:
- Navigate to the Projects Admin page
- Locate the project card you want to copy
- Click the copy project button
 (positioned between the edit and delete buttons)
 - Enter a new project name in the dialog
- Optionally modify the auto-generated project ID
- Click Copy to create the new project
The system will create a new project with the copied training profile.
The following training profile elements are copied into the new project:
- Project's description
- Subjects and their attributes (description, help url, etc..)
- Skills definitions and their attributes (description, points, self-reporting, etc...)
- Skill Groups
- Configured display order subjects and skills is preserved in the copied project
- Levels
- Badges
- Project-Based Learning Path
- Re-used Skills
- Project's Settings are copied with the exception of the exclusions specified below
The following training profile elements are NOT copied into a new project:
- Catalog imported skills are not copied
- Cross-Project Prerequisites are not copied
- If the original Project Discoverability setting was changed to be
Add to Project Catalogthe copied project will instead use the default value ofNot in the Project Catalog
Tips
Once a project has been copied, the new project is disconnected from the original such that changes to the original project will not be reflected in the copy
Copy Subject to Another Project
A subject in its entirety can be easily copied from one project to another. To do this, navigate to the Subject page and click the Copy button located on the top-left of the screen, right below the subject's name. Once the copy operation is initiated, you will be guided through the destination project selection.
The following subject's training profile elements are copied:
- Subject's attributes (icon, description, help URL)
- Skills definitions and their attributes (description, points, self-reporting, etc.)
- Skill Groups
- Configured display order of subject's skills
Tips
After copying a subject, the new subject becomes independent of the original, and any changes made to the original subject will not affect the copied subject
The following elements are excluded from the subject copying process:
- Reused skills
- Imported catalog skills
- Levels: destination project's subject will be created with default level configuration
- Cross-project prerequisites
Warning
When copying a subject to another project, the destination project must meet the following requirements:
- It must not have an existing subject with the same name or ID.
- It must not have any skills with IDs or names that match the copied subject's skills.
Copy Skills to Another Project
Skills can be copied individually or in batches from one project to another. To do so:
- Navigate to the Subject page
- Select one or more skills
- Click the Actions drop-down button at the top-right of the skills' table
- Select "Copy to another Project"
Once the copy operation is initiated, you will be guided through the process of selecting a destination project and subject or skill group.
Tips
After copying skills, the new skills become independent of the originals, and any changes made to the originals will not affect the copied skills.
Warning
Note that the destination project must not have any subjects, badges, or skills with IDs or names that match the copied skills.
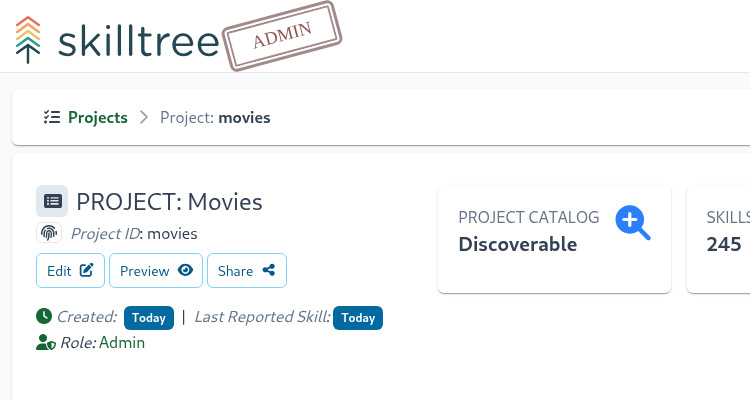
Share Project
Projects can be easily shared with users so they can begin taking the micro-learning gamified training.
To share a project, click on the Share button on the project admin page:
Once the Share button is clicked, the share information modal is displayed:
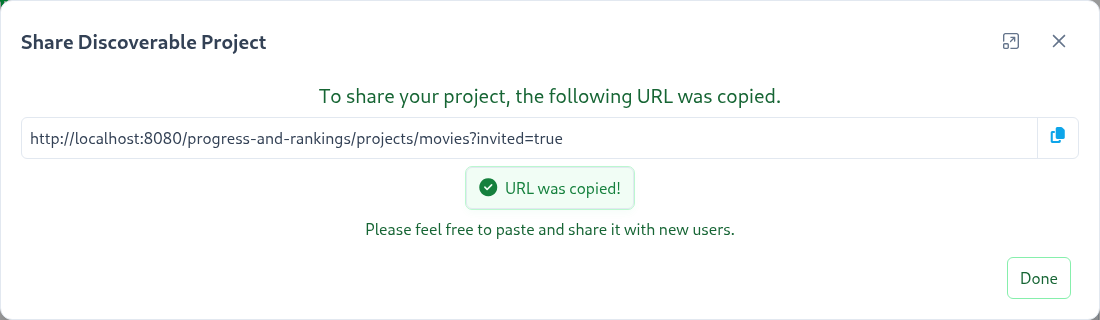
Copy the URL and share it with your trainees. When the link is visited, two things happen:
- The Progress and Ranking page for that project is displayed AND
- The project is automatically added to My Projects.
Important
Please note that once users click on the shared links, this project will appear in that user's Project Catalog even if the project's Discoverability settings are set to "Not in the Project Catalog".
Important
The Share capability is only available if the project was not configured to use the "Private Invite Only" authorization mechanism.
Activity History
The Activity History feature provides a comprehensive record of all administrative changes made to this project.
Activity History includes the following fields:
- User: the user who performed the action
- Action: the type of change made by the user (e.g., Create, Edit, Delete)
- Item: the item that was modified
- Item ID: the identifier of the modified item (e.g., Quiz ID)
- Performed: the date when the change was made
- Additional Attributes: additional fields that can be expanded to view more details
You can sort the Activity History by user, action, item, item ID, and performed fields. Additionally, you can filter the Activity History by user, action, item, and item ID.
Issues
Displays any errors that have been recorded for a Project, how many times they have occurred, and when the most recent occurrence was.
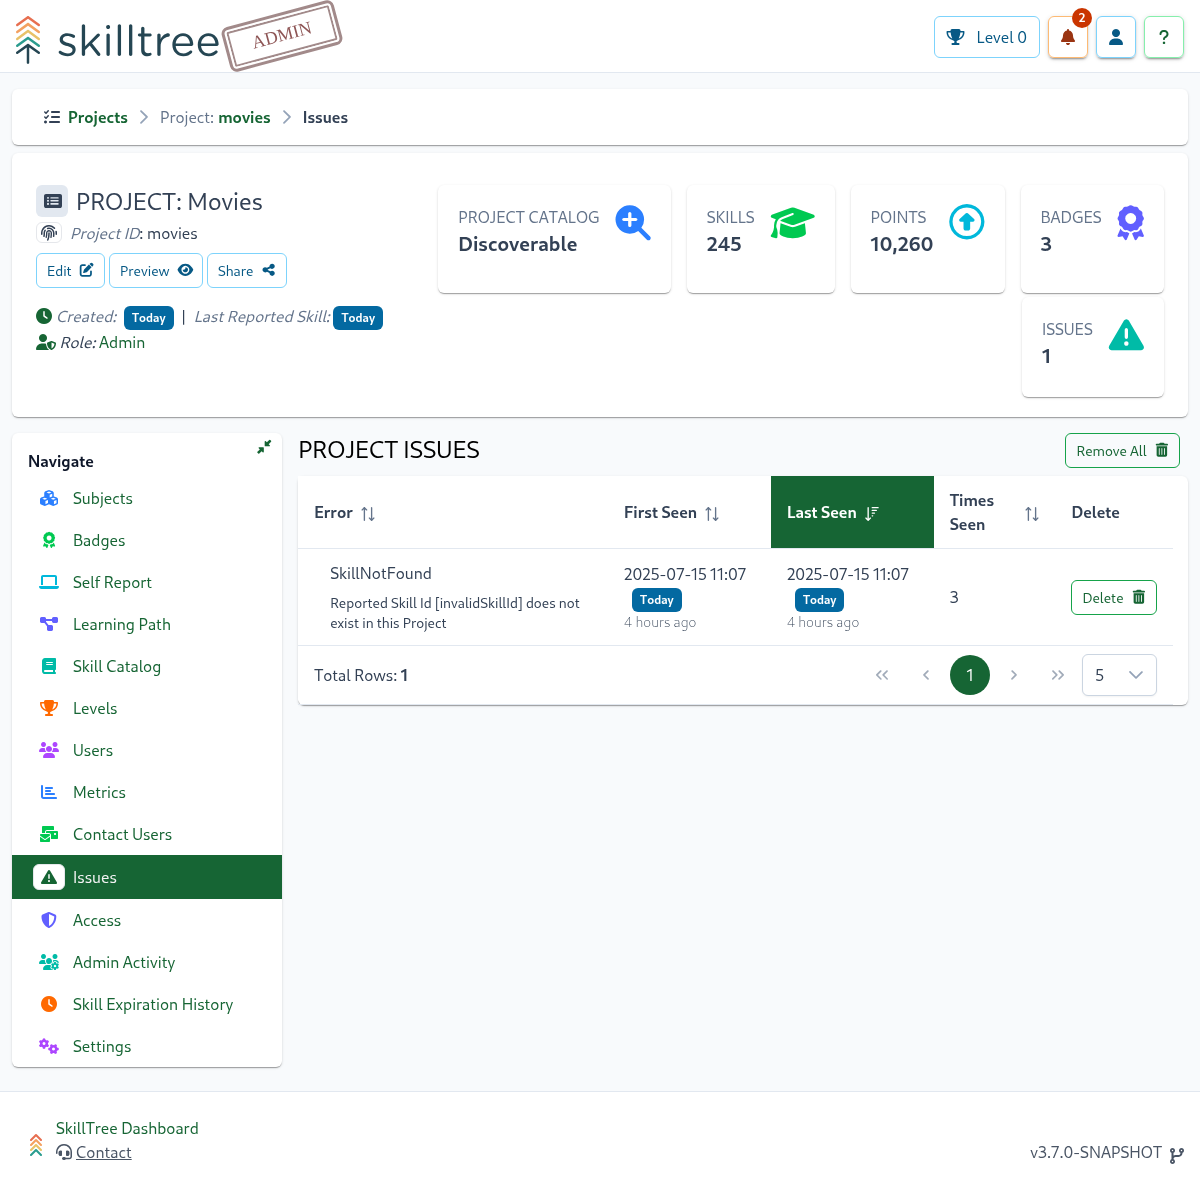
There are a number of different issues that are captured here. One example includes attempts to report a Skill that doesn't exist in a Project. This commonly occurs when a typo has been made during the integration of skill reporting into an application, or when switching an application from using a staging project to a production project where the staging skills do not exist or have been created with different Skill IDs.